OKX DEX is a one-stop, multi-chain, and cross-chain trading aggregator. Through X Routing, the smart routing algorithm, OKX DEX finds the best route to place an order across different DEXs. By comparing prices across liquidity pools and splitting orders, it provides users with the best trading prices with minimal slippage, and lower network gas fees in multi-chain and cross-chain scenarios.
OKX DEX supports over 10 chains, 100 DEXs, and offers over 100,000 crypto assets in one place, which allows it to provide efficient, smooth, and economical multi-chain transaction services. OKX DEX's innovative 'Swap for gas' feature allows users to pay for network fees without needing to transfer additional funds from other places, making it easier to swap crypto across different blockchains. Read the tutorial below to learn how to use OKX DEX.
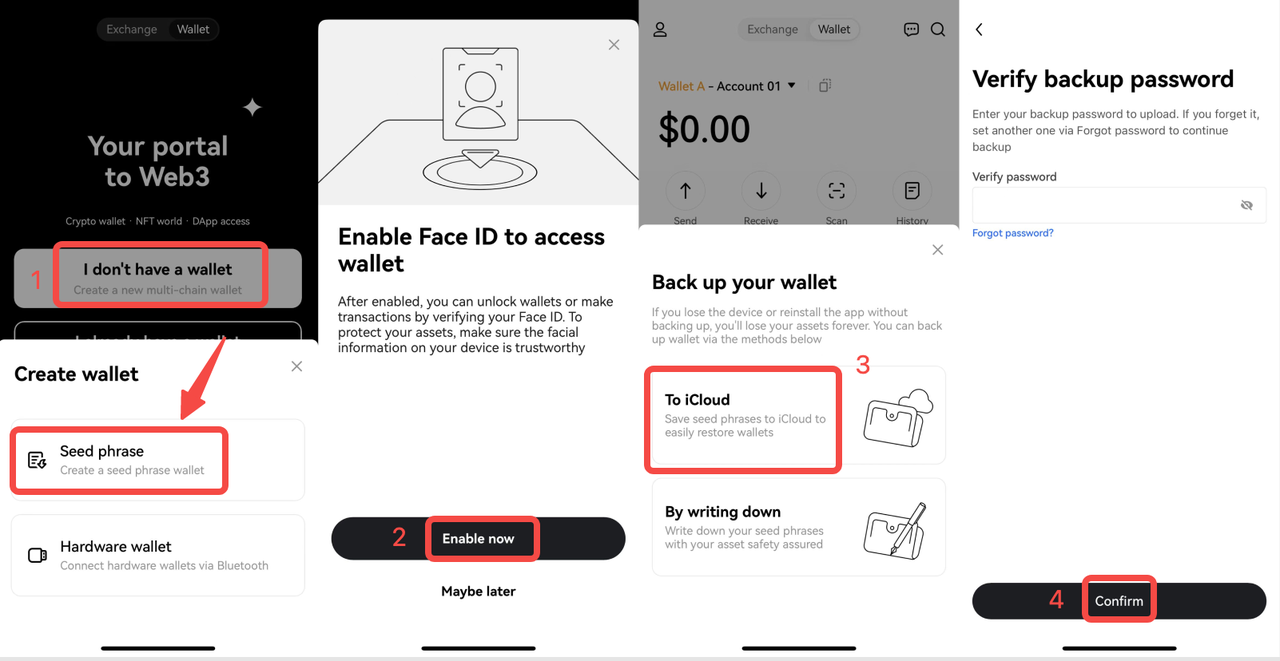
Step 1: Create or import a wallet
Download the OKX App, and switch to Wallet.
[1] Select I don't have a wallet > Seed Phrase;
[2] Enable Now;
[3] Back up now > iCloud Backup;
[4] Enter your password > Confirm to back up.
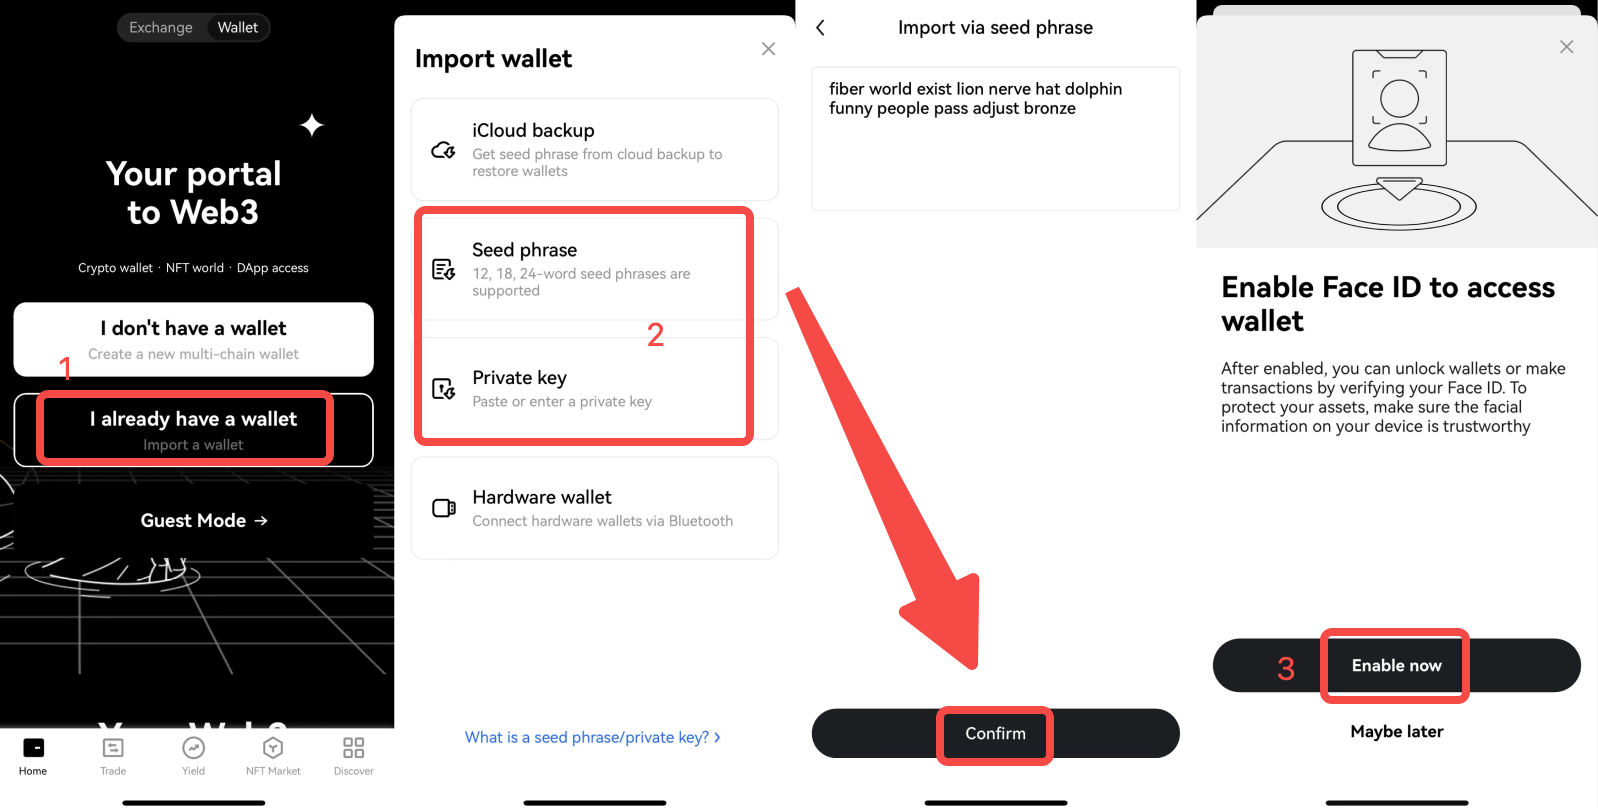
If you already have a wallet, import your existing wallet into OKX Wallet, using your wallet's seed phrase or private key.
[1] Click I already have a wallet
[2] Select Seed phrase or Private keys;
[3] Enable now to complete the import.
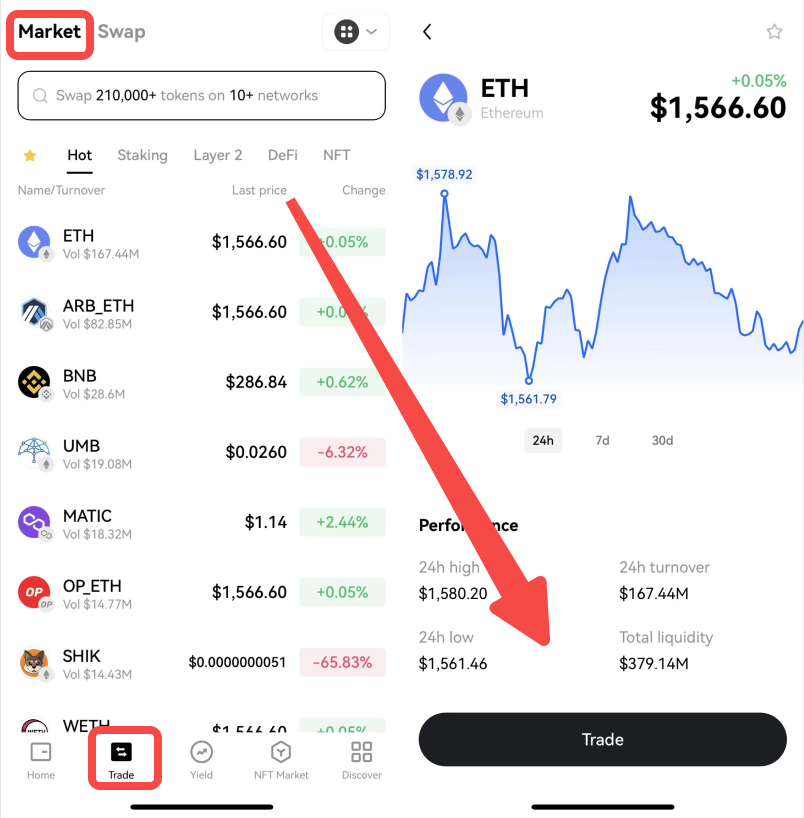
Step 2: Token market
OKX DEX has launched the Token market feature, aiming to help you discover hot tokens anytime, anywhere. Click Trade > Market to see the lists of top-ranking tokens under different categories, such as Hot, Layer 2, DeFi, and view their price, change, and trading volume. Click any token on the list to start trading it.
Step 3: View the token's price chart
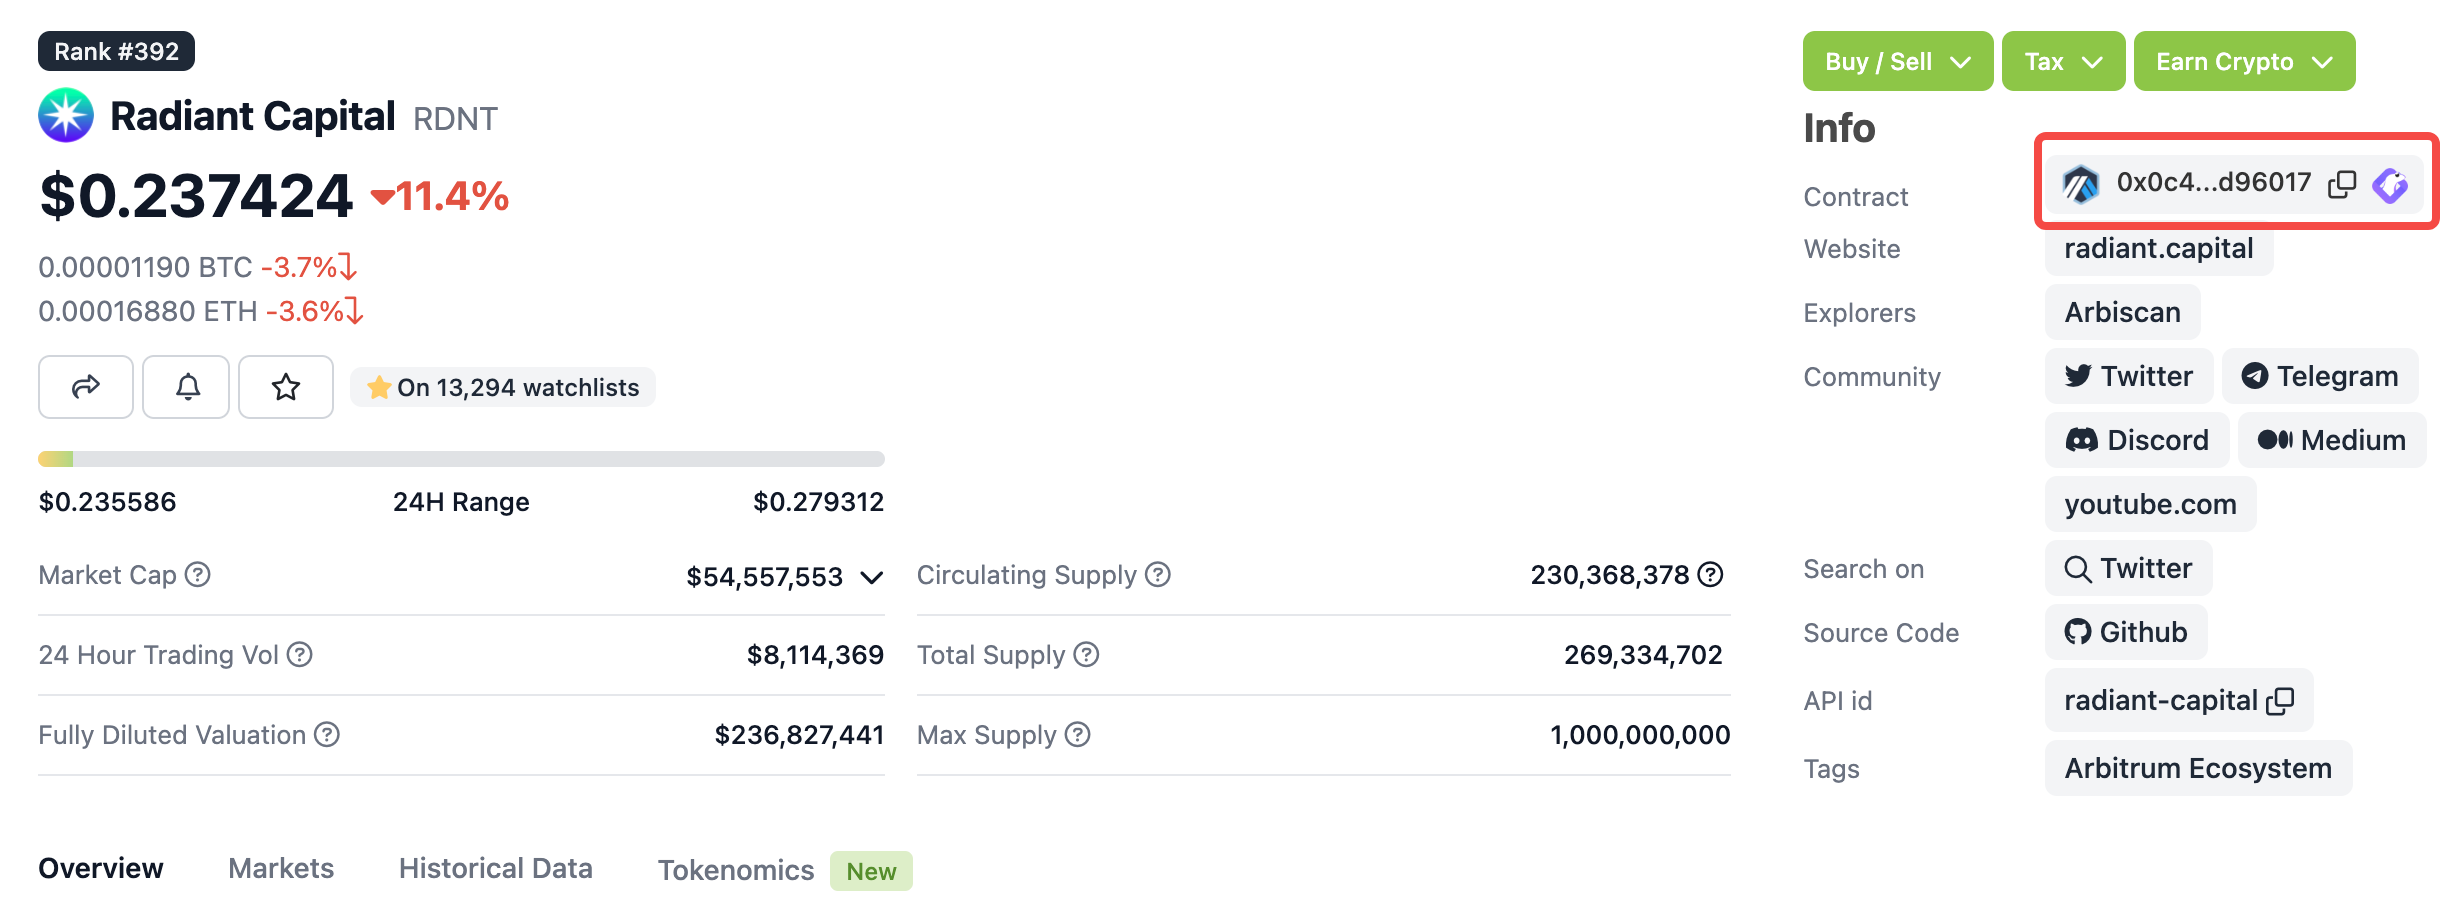
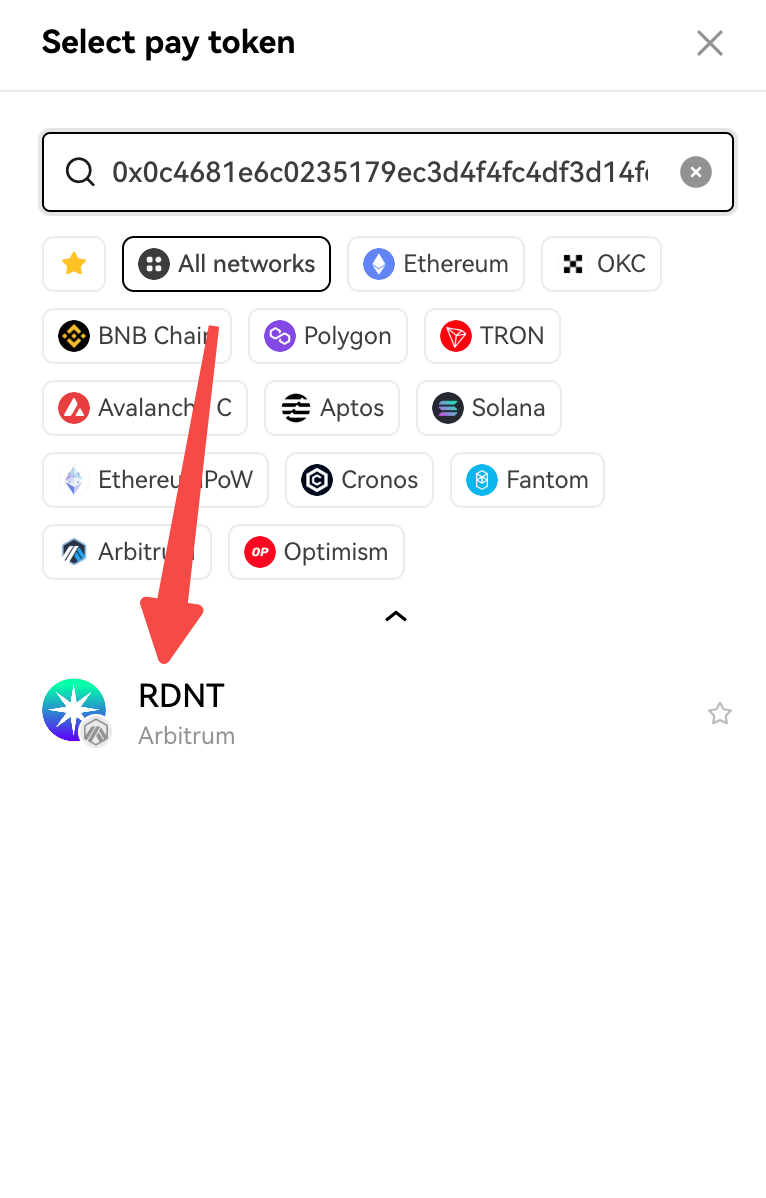
Click Trade > Swap, search by token name, symbol, or contract address at Pay or Receive, and select a network. If too many tokens appear after entering a token's name, and the authenticity can't be determined, you can use CoinGecko to check. Enter the token name in the search box and copy the address in the Contract column on the token details page. Also, make sure to get the network right.
Paste it into the search box in OKX DEX, and tap to confirm.
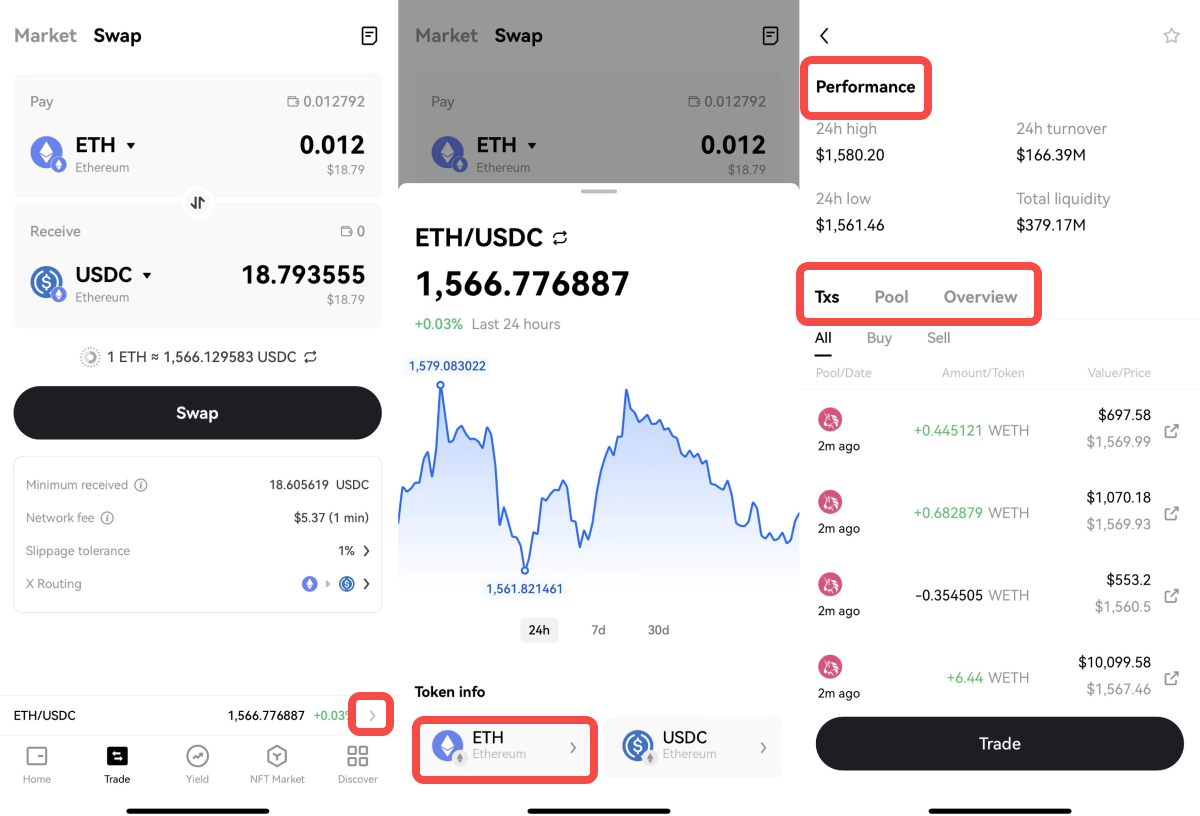
Choose the Pay and Receive tokens, such as ETH and USDC. Click > at the bottom to expand, and you will see the price chart of ETH/USDC. Click one token below Token info, such as ETH, to enter its details page, and it will display the performance, transaction, pool, and overview.
Step 4: Trade
Click Trade to access the DEX page. OKX DEX supports trading crypto on 14 chains and cross-chain swaps on 9 chains.
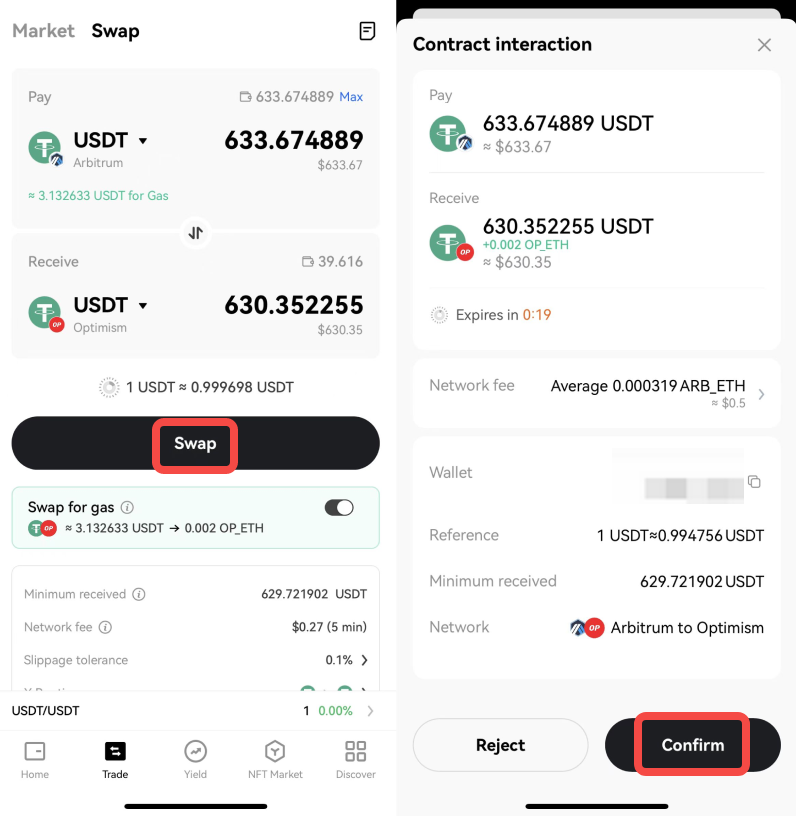
1. Swap tokens across chains
Choose your desired crypto to pay and receive on different networks at Pay and Receive, such as USDT on the Arbitrum network and ETH on the Optimism network. Enter an amount, select Swap, and Confirm in your wallet. Wait for the transaction to be confirmed.
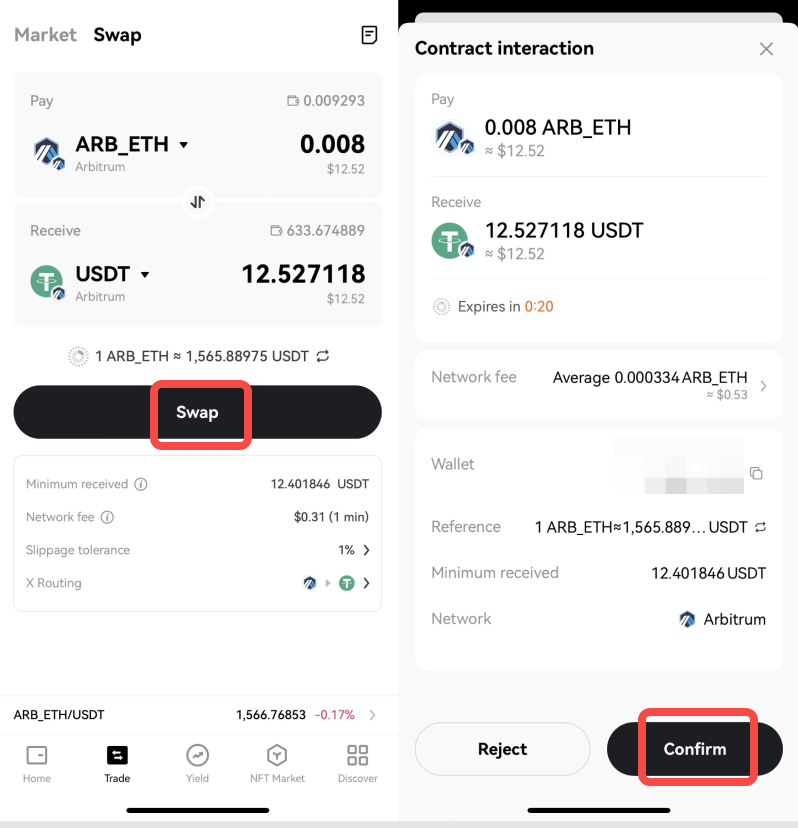
2. Swap tokens on one chain
Choose your desired crypto to pay and receive on the same network at Pay and Receive, such as USDT and ETH on the Arbitrum network. Enter an amount, select Swap, and Confirm in your wallet. Wait for the transaction to be confirmed.
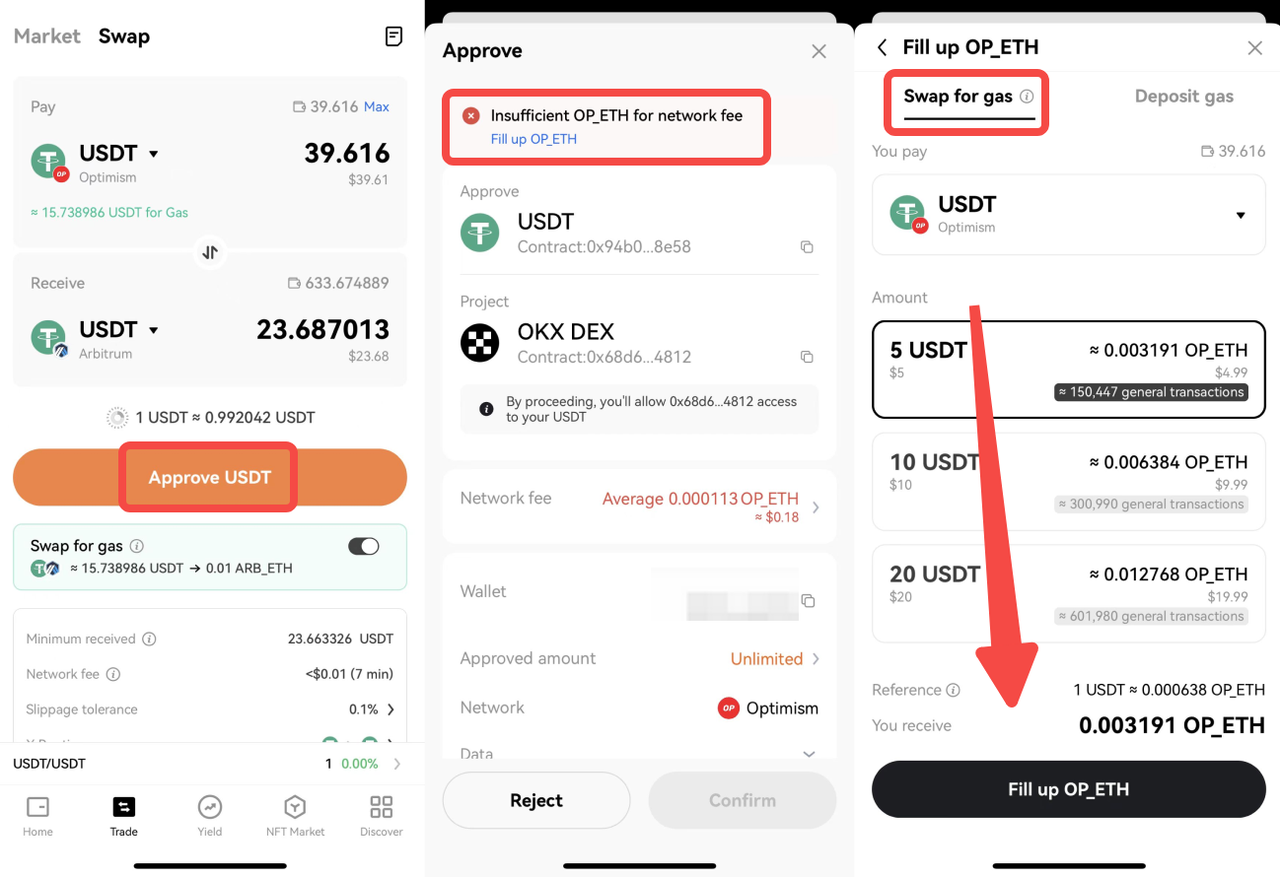
OKX DEX has launched Swap for Gas feature, helping you simply swap USDT, USDC, DAI, WETH, and other mainstream tokens for native tokens, solving the problem of no Gas fee or a lack of Gas fee. Currently, it supports transactions on 8 networks: Ethereum, OKC, BSC, Polygon, Fantom, Avalanche, Arbitrum, and Optimism. You can swap for Gas on one chain or across chains.
For example, you have USDT on Optimism, but no ETH, and you want to swap USDT on the Optimism network to USDT on the Arbitrum network. Choose USDT_Optimism and USDT_Arbitrum at Pay and Receive, click Approve USDT > Fill up OP_ETH, check the Pay token and amount, and then click Fill up OP_ETH. Enter the password to complete the Gas swap.
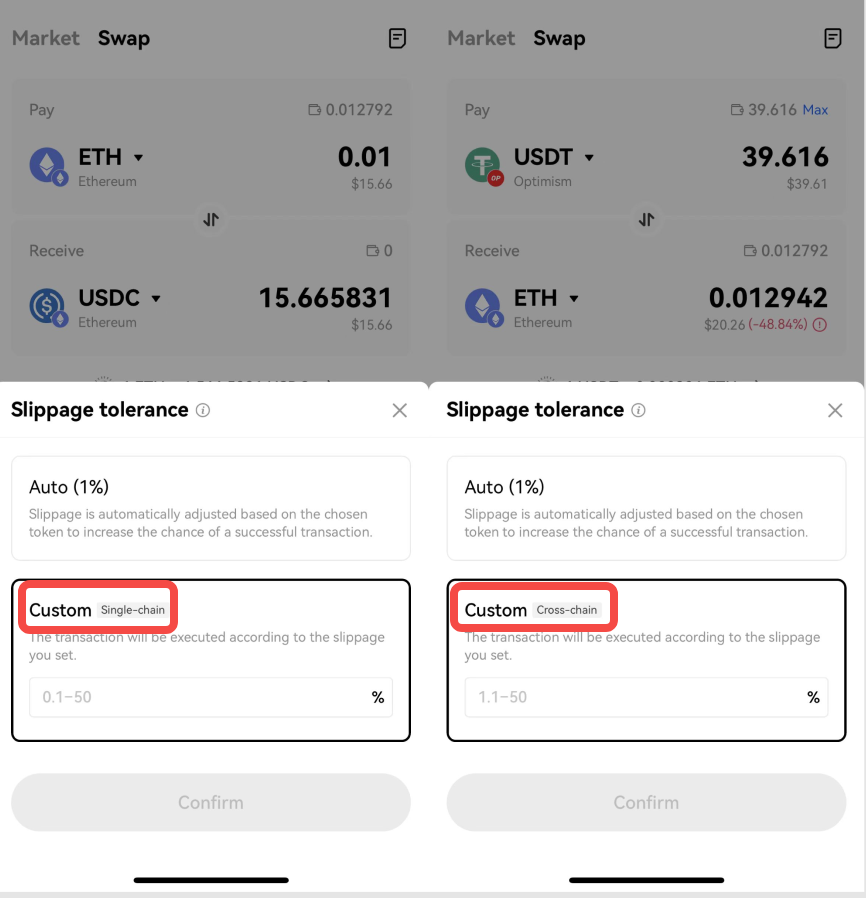
Step 5: Set slippage tolerance
Tap
Slippage tolerance to set the slippage. OKX DEX currently supports automatic or customized slippage (single-chain, cross-chain). Please note that some tokens require certain levels of slippage. For example, some tokens have low liquidity, and the transaction may fail if you set the slippage tolerance to less than 5%.
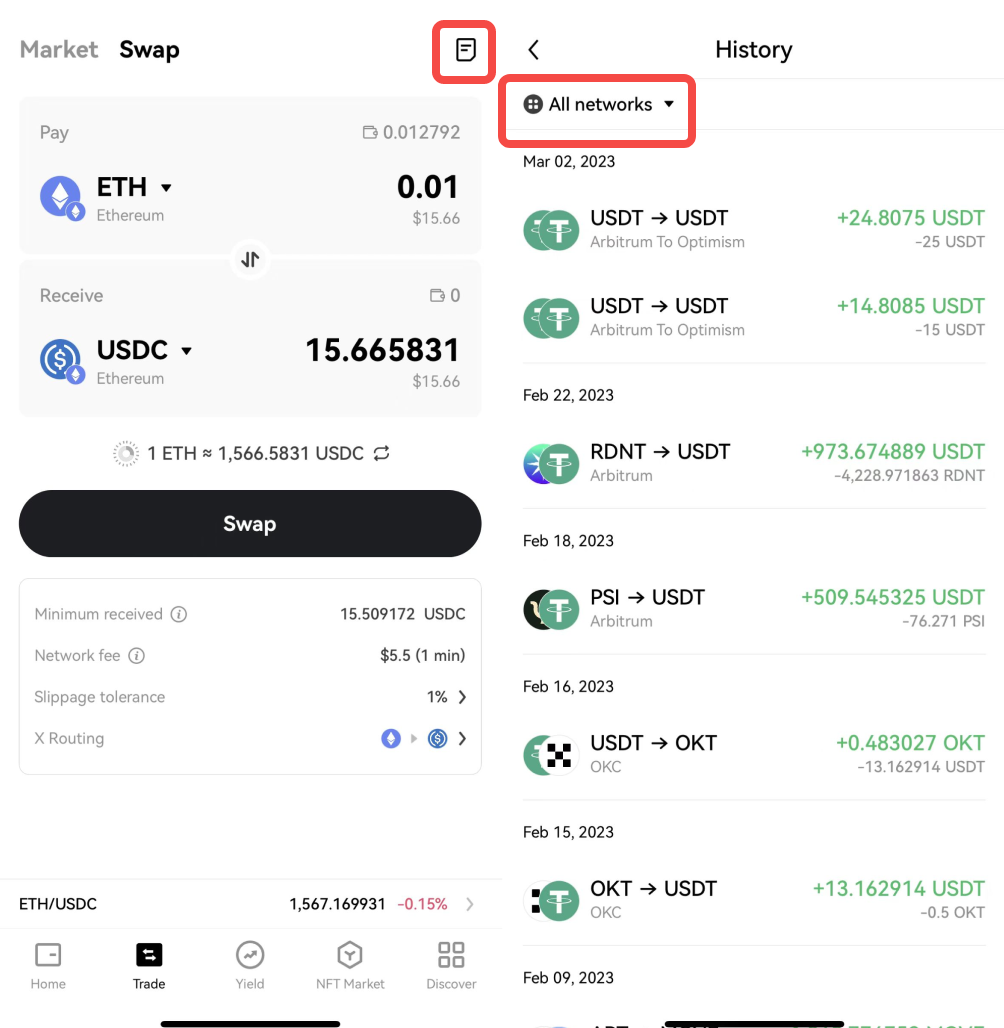
Step 6: View transaction historyAfter a transaction is completed, you can tap the
history icon to view the transaction records or go to the blockchain browser to view the details of a certain transaction. If there are too many transactions, you can also filter by the network to view them more easily.
OKX Team
Mar 10, 2023 (UTC)